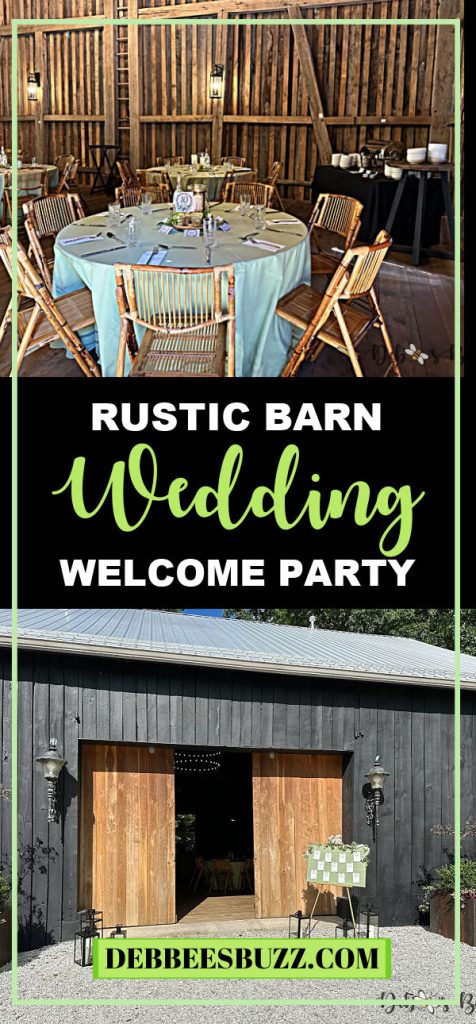
Now that the Unique Rustic Barn Welcome Party for our eldest son’s wedding was held Labor Day weekend, I can share the wine cork crafts and decor. Because a wine theme isn’t occasion, holiday or seasonally-specific, it’s easily applied to many types of gatherings. Perfect for a wine and cheese tasting or fund raising gala, the theme also works for an anniversary or engagement party, couples shower, and wedding reception.

Incorporating the corks from a special event into a home decor project makes a lovely memento. Also consider using corks to make a gift for a friend or family member who’s a wine enthusiast. Wine cork crafts make home decor that’s ideal for decorating a bar cart, home bar or wine cellar.
First, I’ll show you how I made large initials of corks for the couple. There’s also easy-to-make, cork-wrapped place card stands that held table numbers and menu cards. More wine corks were strung on twine with wooden beads to create decorative garlands and embellish a banner.
For lighting elements, small and large glass lanterns were simply filled with wine corks. Another fun atmospheric element were clear glass wine bottles filled with strands of glowing LED lights. Finally, party favors included wine charms, and painted champagne corks resembling members of the wedding party.
Making Large Wine Cork Initials

Here’s a close-up of the finished first initials of the married couple. After letting the glue dry for two days, I leaned the wine cork covered letters on the fireplace mantle to make sure they’d stand on a narrow ledge . No problem!
Step 1: Gather Materials
For materials, you need a large plywood letter, spray paint (optional), glue and wine corks — a lot of them! Although the number will vary depending on the letter of the alphabet, the initial “R” took 125 corks to cover, while the “V” took 96. Save on corks by making only a single surname initial.

Because I did not have near enough in my stash, I purchased a large bag of used wine and champagne corks (see Amazon below). Then, I sorted them into bins by length.
I wanted the height of the corks on the letters to all be roughly the same height when standing. Differences in width was actually helpful in making them fit within the shape of the letters. All the others were put in a second bin for other wine cork crafts I had planned for the party.

Allowing for the average cork size, I used these 12-inch, white-painted plywood letters. You can save money using unfinished bases, but this was the only set I could find that had a “V.”
Because I didn’t want the bright white surface showing after the corks were attached, I spray-painted one side of each letter in a matte metallic gold. To sit between the two initials, a free-standing ampersand was also painted gold.
Craft Tip: If the letters are unfinished, you might be happy to let the tan plywood surface peek around the corks. However, if you have a color scheme for the party or home decor, you can spray paint the plywood any desired accent color.

For added flexibility and to simplify gluing the corks in place, I used a tube of E6000. Using a glue gun would have been a more time-summing and expensive process, as the project would have gone through a huge amount of glue sticks. Plus, I would have had to deal with removing an annoying amount of glue “threads.”
Craft Tip: Spend the extra few dollars for the “no odor” version of E6000 glue. It’s well worth not having to deal with the toxic fumes, especially with the volume of glue used.
Glue Corks Onto Plywood
Start by setting the corks on top of the plywood to see how they line-up and fit. Unless you purposely chose to use new corks, I recommend alternating the used or unused ends right-side up for color shading.

I also tried to create some interest and variety with corks that had letters, words or images printed on the ends (see “Drink Me” above). Just make sure you place them so they will be right-side up, once the letter is displayed standing or hanging on a wall.
Begin gluing corks at the bottom of the letter, to ensure a flat row or even surface. When possible, I also positioned the corks so that they slightly overhung the plywood edges. I’d do about four to six rows at a time, before pausing to slightly reposition corks to fit against each other, fill spaces, and keep reasonably straight lines.

Allowing the time to adjust the position of the corks to fit the shape of the letter is key. That’s the main advantage of using E6000 glue; as it takes a couple of hours to setup and dry.
There are going to be instances when you need to allow more spaces between corks to account for the contours of the letter’s shape. Sometimes, that’s where a wider champagne cork can be useful.

The shapes of some letters may make some spots trickier than others, especially rounded edges. “Hiding” those imperfections is why choosing a more neutral or subtle shade for the plywood letter is important.

Slide and adjust as needed. It’s really an imperfect process that somehow all works out in the end!
Finishing
Before testing how the finished letters would lean on a mantle, I let the cork-covered plywood dry flat for 48-hours. Once satisfied nothing was moving, I also did a preview staging of how I planned to display the letters at the destination wedding with lighting and greenery elements.

Craft Tip: The letters I purchased came with hanger hardware to attach to the back. After the wedding, I had thought the couple could hang the letters on a wall over the bar cart at home. However, I doubt that hardware on the thin plywood could hold the surprise weight of all those added corks. Instead, I’ve suggested they hang a small shelf to stand the letters on.

Two added display challenges at the barn venue itself were taken care of by Mr. Buzz during the party setup. We knew the stone fireplace made for an irregular, non-flat surface to stand the letters upright. And, the mantle was actually a very narrow ledge.
So, hubby cut and placed flat pieces of cardboard under each letter. He also used some heavy-duty clear packing tape between the plywood backs and stone surface.
Wine Cork Wrapped Card Stands
Leftover corks from the covered letter project were used to wrap around tall, metal card stands. I used them to display table numbers in the centerpieces, or to hold menu cards on the dinner buffet. Now that the party is over, I’m planning to reuse them to hold labels identifying types of cheese, meats or appetizers on a crudité board or spread.
With enough corks and stands (and energy lol!), you could also make individual guest place card holders for wine theme event.

All you need to make your own are taller stands (most place card stands are not tall enough for standing height of a cork), glue, three corks per stand, and twine. Try to find trios of similarly height and width corks — champagne corks don’t work here. Put them aside in groups of three for each stand you plan to make.
Before you start to assemble, pre-cut lengths of twine — enough to wrap around the corks twice and tie a double-knotted bow.

Work on a surface where, once dry, the glue will easily pull from. I found that a stiff piece of the clear plastic stand packaging worked like a charm. Now, apply a circle of glue on the bottom spiral wire base, working one stand at a time. Quickly position three corks around the stand, alternating used and unused end of the corks.
Enlist another set of hands to hold the corks while you wrap and tie the twine in place. Now, turn corks to show off lettering or imagery on the sides. Once you’ve completed all the card holders, squeeze more glue behind the bow knot and press to the cork. Let dry at least two hours before peeling the stand from the plastic protective surface.
Wine Theme Lighting
Fortunately, one of the bridesmaid’s works at wine festivals, collects corks, and also incorporate corks into projects! She generously sent me another 500 plus corks to further fuel my wine cork crafts.
Cork Filled Lanterns

I had always intended to use corks to fill large glass and black iron lanterns that anchored the centerpieces. Each of the 12 lanterns took about two dozen corks to fill. Quick and easy to do! It was also a way to use broken or odd size/shape corks.
For wine theme home decor, you could simply add corks around the base of a large, singular lantern candle — adding them as you open a bottle?

Although it’s harder to see through the patterned glass in these smaller lanterns, more corks surround birch-wrapped LED candles on the cocktail tables.
LED String Lights in a Bottle
Included in each centerpiece and displayed around the barn, were 24 wine bottles filled with LED string lights. The battery and on/off switch is disguised in a faux wine cork. Individually, or in small groups, the lighted bottles also look great and create a romantic ambiance when displayed on a home bar, wine cellar or wine cart.

Like the lanterns, these are just a matter of simple assembly. For the rustic barn, I used copper wire with warm white lights. However, you can purchase the LED stands in different color lights and wire to fit your party or home decor. Batteries can be replaced too.
Put them together by first spreading out the wire. I then used a meat skewer to help insert and arrange the wire in each bottle.
Wine Cork & Bead Garland
With leftover corks and twine, I also decided to make three simple wine cork and wooden bead garlands.
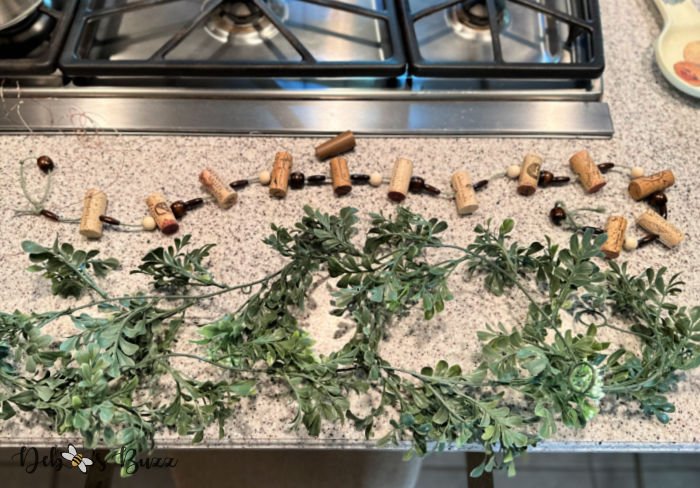
First, I drilled holes through the middle of numerous wine corks. Then I knotted one end of the twine to create a loop for hanging. With a long, flexible needle (used to assemble the Adorable Crochet Zebra Homemade Gift), I threaded a pattern of corks and wooden beads onto the twine. Another knot and loop finished the length of twine.
As they are, they could also be used to decorate a bar, wine cellar or bar cart — even a wine theme holiday tree!

Afterwards, I wrapped each finished cork and bead string (along with two of the LED light strings) around a faux greenery, five-foot garland. These were used to decorate the table seating chart, and sweetheart table centerpiece.

More twine, corks and beads were used to string the homemade I Do BBQ party banner.
Wine Theme Party Favors
A simple guest favor for a wine theme gathering are wine charms. I purchased wine theme charms (Amazon below) for the party, embellishing them with little multi-shade green beads.

I placed them all in a large margarita glass at the wine and craft beer bar, with a sign to “take one.”

Finally, I painted Easy DIY Champagne Cork Wedding Party Figures to sit next to corresponding place cards. Because I’m ever the Queen of Theme, I couldn’t resist one last wine cork craft to make wedding party avatar keepsakes!
More Wine Cork Crafts & Inspiration
Looking for another great home decor idea? Check out this Wine Cork Wreath DIY Tutorial.

And check out Bountiful NYC Urban Garden: Up on the Roof and Philadelphia Rowhouse Urban Rooftop Garden to see how I used wine corks as herb garden markers.
Do you save corks? Done any wine cork crafts or used them for home decor?

Come travel to Paso Robles: Wine Tasting & Field of Lights for more inspiration. We recently returned from Provence and Burgundy France, where we enjoyed many French wines (and food!) and visited several vineyards. Hoping to share our experiences and pictures of the beautiful area soon.
Don’t know about you, but I’m feeling overwhelmed and distressed over the conflicts and violence in Ukraine, the Middle East, and around the globe. And here we are with a non-functioning Congress! Honestly, I just want to scream sometimes. Rather than being glued to the endless stream of bad news on the TV, I’m distracting myself by blogging today and hoping it provides you with a tiny reprieve too.

Related Post Picks
I use affiliate links and am an Amazon Associate. If you make a purchase I may earn a small commission that helps to offset website operating costs with no additional cost to you. Your support is appreciated! Disclosure Policy.
Pin for Later

Link Parties
I regularly participate in: Metamorphous Monday, Share Your Style, Tablescape Thursday, Thursday Favorite Things, Saturday Sparks, Happiness is Homemade, and Love Your Creativity.















Brilliant Debbee!! I’ve got about a zillion corks and now I know what to do with them! Such great ideas, and I bet the bride and groom were so happy with their theme. I love the bride and groom corks – what a sweet thing to do. Thanks for the fabulous inspiration!
Thanks Barbara, but you give me too much credit. Many of the ideas are derivatives of inspiration found on Pinterest. They did love the theme, and it seemed to have wide appeal with the guests. The entire bridal party really got a kick out of their cork avatars. One is sharing photos of theirs — a sort of where in the world is…! Seeing the newlyweds this weekend as my husband is running the NYC Marathon.
Oh I really love these wine cork initials decor! These look so good!
Thanks Natasha! Will you make one or more yourself? If so, let me know how it turns out.
Some really great cork ideas Debbee, I will have to start drinking more wine lol x
Glad you liked them, planning to try crafted one? Enjoy a glass of wine while you’re working!
Glad you liked them, planning to try crafted one? Enjoy a glass of wine while you’re working!