
Recently, a number of people remarked on the Halloween skeleton decoration I had taken Mr. Bones from to create a Jaw Dropping Chandelier. 
In case you missed it, the decorated light fixture was part of a Spooktacular Skeleton at the Feast Halloween Table scene.
Did you enjoy the tablescape blog hop? Visit many of the other Halloween settings? There were a number with a skeleton theme, and it was fun to see all the different interpretations.
Luckily, I had taken photographs as I deconstructed the It’s a Scream tabletop display. With my own noggin not being what it once was, I wasn’t sure I’d remember how to reassemble it someday, LOL!
So, let me show you how easy it is to create your own Halloween skeleton tabletop display. Use it to decorate a buffet, entry, or fireplace. A smaller version would work well on a coffee table or as a centerpiece.
I use affiliate links. If you make a purchase, I may earn a small commission that helps to offset website operating costs with no additional cost to you. Your support is appreciated! Disclosure Policy.
How to Make a Halloween Decoration Display

Whether large or small, it’s easy to make a spooktacular Halloween skeleton decoration in under an hour. But first, you’ll need to gather together all the materials.
Eerie Elements
I already had a large black plastic cauldron on hand to use as the foundation of the decoration. It was originally purchased to use as a large punch bowl for Halloween parties.

- Black cauldron (16″ diameter)
- Floral foam bricks (6-8)
- Spiderweb & straw
- 2 foam tombstones (20″ tall)
- Fall garland
- Assorted tall, black branches
- Halloween & fall theme faux florals
- Resin, plastic skeleton (3′ length from skull to toe bones)
- Rubber rat
You could substitute a smaller cauldron, then scale down the size of the tombstones, skeleton and rat to fit.
Doing so would mean a Halloween decoration with a smaller footprint, sized to sit on a coffee table or serve as a centerpiece. It would also reduce material costs.
Project Tip: Before you start putting the decoration together, I suggest spreading out newspaper or a sheet of plastic under the cauldron. It will make for much easier cleanup. Cutting the foam bricks and covering the filled cauldron with straw can get a little messy.
Step 1: Fill Cauldron
To save on volume of floral foam needed to fill the cauldron, I placed an old hanging basket upside down inside. It also added some counterweight to the display.
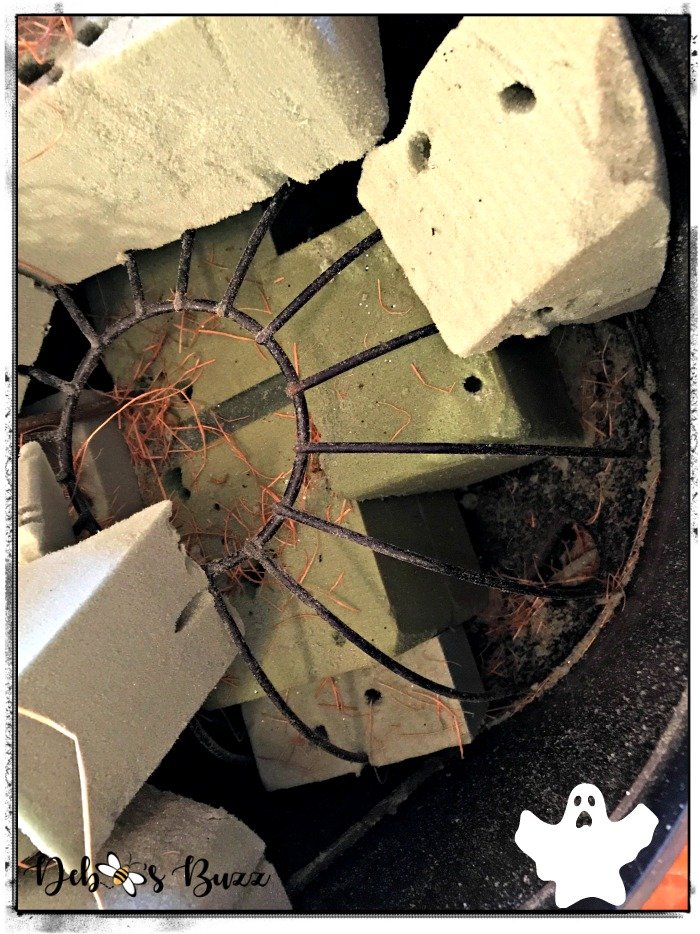
If you don’t have something similar, just add a few rocks to the bottom of the cauldron.
Most of the foam bricks were pieces and scraps recycled from previous projects. To fill the cauldron snugly, some bricks were cut to fit. Others were wedged into place.
Step 2: Hide Foam
I used a combination of straw and spiderweb to cover and camouflage the foam bricks.
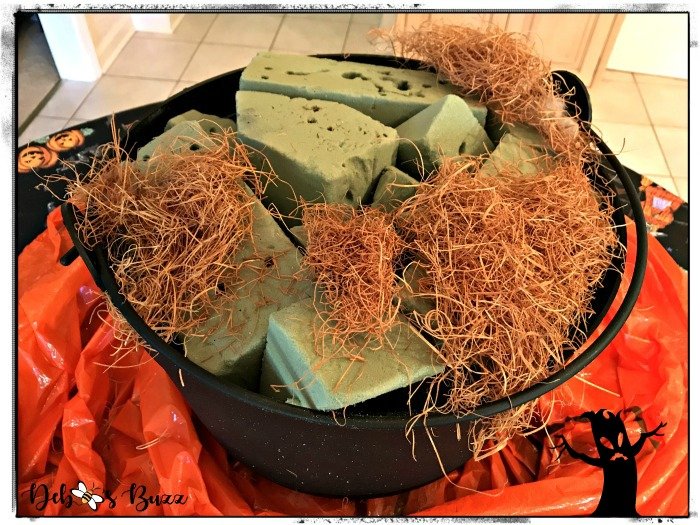
You could probably use just one or the other. However, the spiderweb helps to create the illusion of a smoking cauldron, or spooky graveyard mist. In hindsight, I’d definitely add or pull more spiderweb over the edges, and down the sides of the cauldron.
Step 3: Insert Tombstones
Next, add two foam gravestones to create a backdrop for the Halloween skeleton tabletop display.
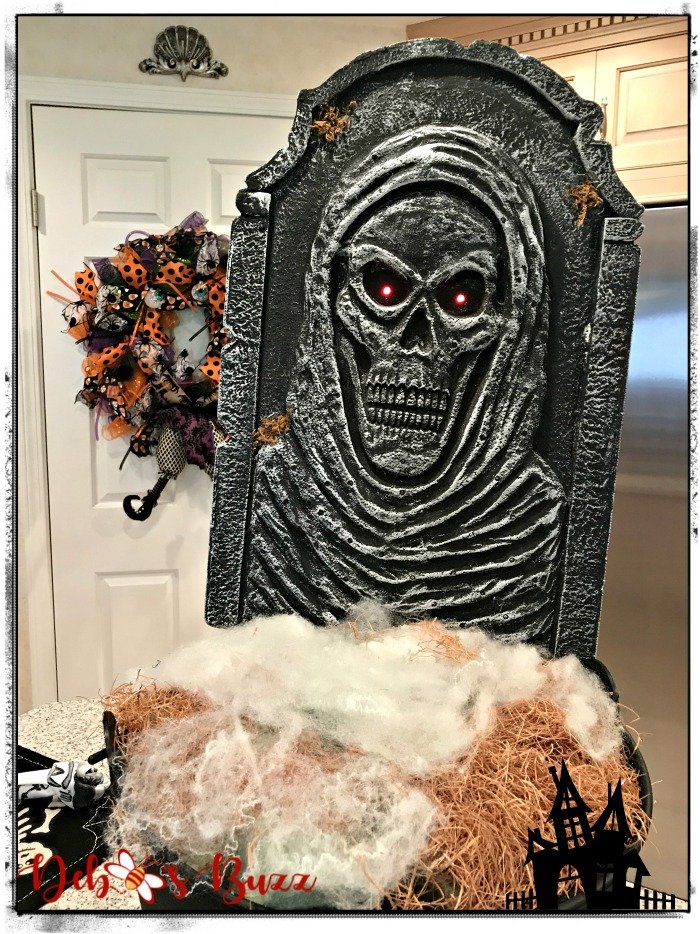
Decorative headstones come with holes pre-drilled into the foam, and two plastic stakes so you can insert them into the ground.
For the Halloween skeleton tabletop decor, they also easily insert into the foam bricks.
One tombstone is positioned slightly in front and overlapping the edge of the other.
I purposely placed each gravestone at an angle; so that they fanned out at the top. That positioning also allows you to see more of the imagery on the front of each headstone.
Besides, in any old, haunted cemetery, tombstones often sit at all kinds of odd angles right?
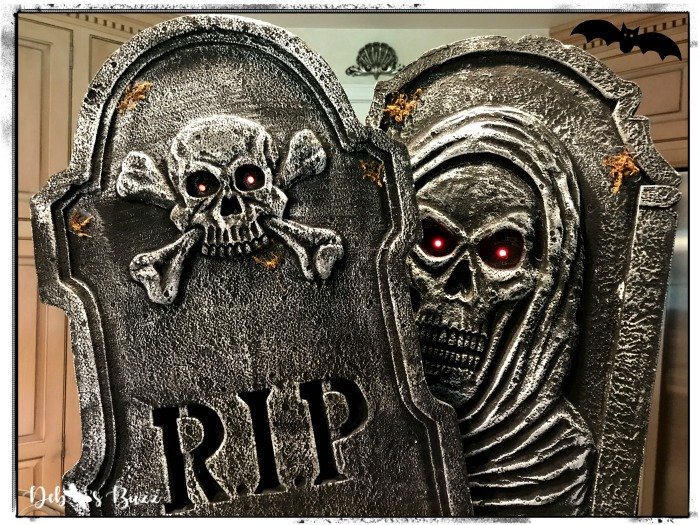
Use foam gravestones that are taller in height than the seated skeleton. Mine are both about 20-inches, with a 36-inch skeleton.

Now, that you have the cauldron foundation and headstone backdrop in place, it’s time to fill in the rest of the spooky scene.
Step 4: Add Garland
For some color contrast against the black cauldron, I weaved a length of leafy and pumpkin garland around the handle. If your cauldron doesn’t have a handle, simple place the garland along the edge and secure into the foam.
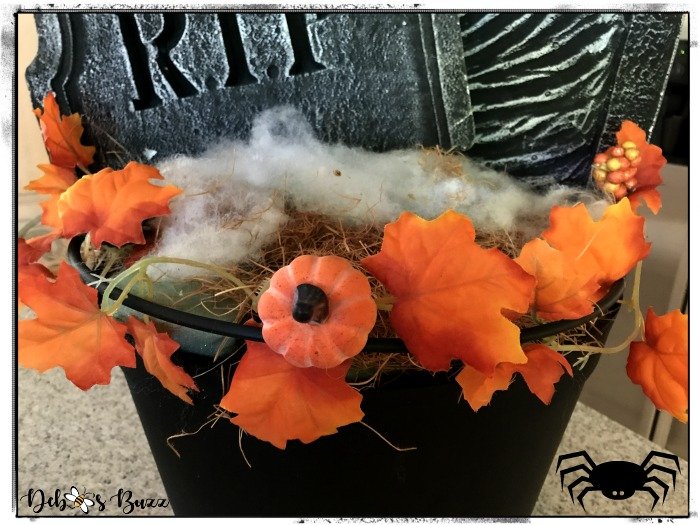
For a more dark and monochrome look, you could use black leaves with silver highlights.
Or, something like the bone parts garland used to decorate the Jaw Dropping Halloween Chandelier.

I just happened to have a leftover piece of the leaf garland when I originally assembled the skeleton decoration. Besides, I wanted pops of orange in the Halloween skeleton display for color contrast.
Step 5: Secure Skeleton in Position
Now it’s time to seat Mr. Bones on top of the cauldron. Put him in an upright position with his spine against the tombstones. The skeleton’s legs should dangle over the edge of the cauldron, with his feet resting on the tabletop.
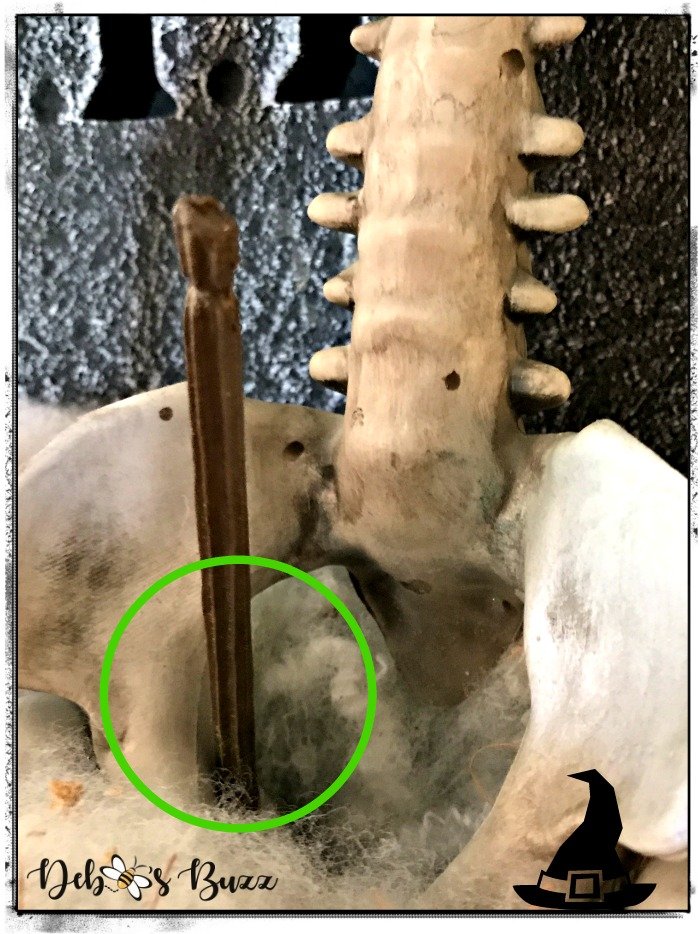
Secure in place, by inserting two long floral stakes through either side of the pelvis.
Push them all the way through the foam bricks, and deep into the cauldron to touch the bottom.
For added support, weave one or two more sticks through the skeleton’s shoulders and back of his ribcage.
Placing the weight of a rubber rat in the skeleton’s lap — and across the leg bones — adds counterweight to help keep him sitting upright.
For extra hold, I also looped one of the skeleton’s hands and fingers through the cauldron handle.

His other hand was set on top of the rat — as if petting his pet LOL!
Step 6: Add Embellishments
Finally, add faux florals and spooky details to fill in the cauldron. Add more around the tombstones.

I used a combination of spooky tall black branches and sprays of orange flowers to decorate behind, beside and over the top of the tombstones. Sprays of leaves in fall colors were placed around the Halloween skeleton.
I decided against adding a giant bow to one side of the cauldron, but that’s another option. It all depends on the look you’re going for.
Not pictured here, are a black string of tiny (battery-operated) orange lights that were weaved along the cauldron’s edge. I added those when the Halloween skeleton decoration was moved into the front hall to greet trick or treaters.

Mr. Bone’s was a big hit with the kids. Especially the jaw-dropping smile and blinking red eyes in the tombstones.
In all the years I’ve had those foam tombstones, the glowing eyes continue to flash — thanks to an on-off switch that conserved the original batteries.
Skeletons, Ghosts & Witches — Oh My!

Update 2020: For more ways to use a skeleton, don’t miss the Gothic Glam Table with Skeleton Napkin Fold and Silly Skeleton Poses.
Well, that’s it on my trio of skeleton theme Halloween posts. Too spine-tingling for you? Do you have any skeletons haunting your house or yard for Halloween?
Bee sure to check out the Not-So-Scary Halloween Decor Home Tour and Retro Green Ghost Game Night for some lighter fare.

Have you got up all your Halloween decorations yet?
Happy hauntings!

Related Post Picks


Featured Post

Link Parties
I regularly participate in: Metamorphous Monday, Share Your Style, Tablescape Thursday, Thursday Favorite Things, Saturday Sparks, Happiness is Homemade, and Love Your Creativity.
















What a fun and spooky centerpiece! My boys would love it.
Thanks Pam, my sons loved it too. Although, they approve of my moving Mr. Bones into the Jaw Dropping Halloween Chandelier this year.
I enjoyed your post very much! I should think trick or treaters would just love it. I miss decorating as much for Halloween now that kids are gone! I pretty much limit it to my front hall; had the best time at ACMoore this week with Halloween being 70% off. Couldn’t resist another plaque for me and bottle for daughter! And tiny pumpkin lights for my Halloween dollhouse!
Because we still get a large number of trick or treaters, I muster my enthusiasm to decorate outside too. Although, we haven’t carved a real pumpkin in a number of years. I love and miss the smell of a candle burning in a jack-o-lantern. We don’t have an ACMoore, but sounds like you got some great buys! A Halloween dollhouse — how neat is that?!!
Debbee–We won’t have an AC Moore much longer as they have been bought out by Michael’s; they will probably close by Feb. or March. I will miss my favorite sales people as much as the bargains! A new Hobby Lobby is coming to a nearby town which will be detrimental to my grocery budget; the current one is an hour away! My super power is bargain shopping!
Although it’s nice to have great stores nearby, it also can be hard to resist shopping too often/much. That’s why I’m sorta glad HL and Home Goods (especially) are about 40 minutes away. I have a similar issue having Pottery Barn and William Sonoma right down the street. Can take advantage of great sales, but nowhere to put stuff anymore, LOL!
Thank you for your enthusiasm for all the holidays. I think they make life interesting and fun. I am sure your friends and loved ones appreciate the fun you make.
That’s so very sweet of you to say Carolyn and much appreciated!
Debbee, you are so creative. Your place looks amazing. Congratulations, you are being featured on Thursday Favorite Things.
Thanks so much Beverly! Glad you enjoyed my little more spooky style of decorating.
Oh my… this is very creative. I just shared it to my Pinterest page and tweeted a few… Great work.
Thanks for stopping by LaFayne! Appreciate the compliment too.
This is great, I love the expression on the skeleton’s face.
Happy Halloween Anita. Glad you liked the look. Similar to the one in a Jaw Dropping Halloween Chandelier.
Debbee, No matter the holiday or occasion, you always do the best job! You are so creative! I loved this! It has been a kind of a bummer of Halloween season for me this year, with no trick of treating, no visiting grandchildren. Hopefully next year will be better. I know where to come for ideas!!
Chloe, thanks for visiting — your kind remarks made my day! I agree about Halloween; it’s the 2nd year in a row I didn’t get to decorate. Last year was my son’s surgery on the 31st in Philly, this year is the virus and my foot surgery earlier in the month. I don’t have grandkids, but feel so badly for the little ones and their families. Next year, I hope to have a Halloween bash with a coven of witches theme of my gal pals. Wanna come? Would love to meet in person some day!